Ironclad Self-Damage Berserker Build — Best Cards & Relics

The Self-Damage Berserker turns the Ironclad’s HP bar into a weapon. Every point of self-inflicted damage becomes Strength via Rupture, block via Self-Forming Clay, and card advantage via Offering. This is the highest-risk, highest-reward Ironclad archetype — you’ll often hover at 20-30 HP while dealing triple-digit damage.
Build Overview
The engine is a three-card combo: use Offering to draw and gain energy, take self-damage from Hemokinesis or Combust to trigger Rupture’s Strength gain, then close fights with Blood for Blood (which costs 0 after enough self-damage). Self-Forming Clay and Burning Blood keep you alive through the self-inflicted damage.
The build needs careful HP management — every fight is a balancing act between spending HP for power and preserving enough to survive.
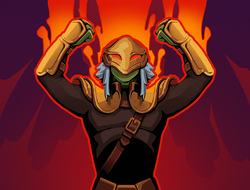
Self-Damage Berserker
 Self-Forming Clay
 Burning Blood
 Tungsten Rod
 Red Skull
Strategy
Stack Rupture early — each point of self-damage becomes Strength. Use Offering for draw and energy. Hemokinesis provides a repeatable self-damage trigger. Let Blood for Blood discount itself to 0 cost from self-damage taken. Finish fights with massive attacks backed by 15+ Strength.
Core Cards
Rupture — The centerpiece. Every time you lose HP from a card, gain 1 Strength. Upgrade to 2 Strength per trigger. Priority upgrade.
Offering — Lose 6 HP, draw 5 cards, gain 2 energy. The best draw card in the game. The HP loss is a feature, not a cost — it triggers Rupture.
Hemokinesis — Deal 18 damage, lose 3 HP. Repeatable self-damage source that also hits hard. Scales with Strength.
Blood for Blood — Costs 4, but its cost decreases by 1 for each time you lose HP in combat. In this deck it’s often free by turn 3. Deals 22 damage.
Brutality — Lose 1 HP per turn, draw 1 extra card each turn. Passive Rupture trigger every single turn. The chip damage adds up — have sustain ready.
Combust — Lose 1 HP per turn, deal 7 damage to all enemies. Another passive Rupture enabler that also provides AoE. Pairs well with multiple Ruptures.
Key Relics
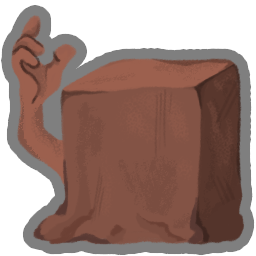
Self-Forming Clay — Core defensive relic. You gain block equal to the HP you lose. Every Offering gives 6 block. Every Hemokinesis gives 3 block. Turns self-damage into a block engine.
Burning Blood — Your starter relic heals 6 HP after combat. In this archetype, that healing is essential sustain.
Tungsten Rod — Reduces all HP loss by 1. Cuts Brutality’s chip damage in half. Makes Combust free. Increases your margin for error enormously.
Magic Flower — Healing is 50% more effective. Burning Blood heals 9 instead of 6. Reaper with high Strength full-heals in one swing.
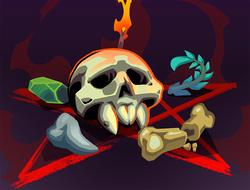
Red Skull — +3 Strength when below 50% HP. You’ll be below 50% HP most of the time — this is permanently active.
Act Strategy
Act 1
Goal: Draft Rupture and a self-damage source before the boss. Skip Hemokinesis if you don’t have Rupture yet.
Pick priority: Rupture > Offering > Hemokinesis > Cleave > Anger > Clothesline.
Upgrade Rupture first. The difference between 1 and 2 Strength per trigger is build-defining.
Fight elites cautiously — you can take Gremlin Nob if you have Hemokinesis. Avoid Lagavulin without Rupture; the fight is too long without scaling.
Act 2
Goal: Add Blood for Blood or Combust as a Finisher. Layer multiple self-damage sources.
Pick priority: Blood for Blood > Combust > Brutality > Disarm > Flame Barrier > Reaper.
Combust solves the AoE fights that punish single-target builds. Reaper with Strength heals you from dAngerous HP totals.
Act 3
Goal: Add draw consistency and defensive tools. Your damage should already be solved.
Pick priority: Offering (second copy) > Reaper > Impervious > Battle Trance > Disarm.
Time Offering carefully — the HP loss matters more in long boss fights. Against the final boss, prioritize getting two Ruptures in play before going aggressive.
Common Pitfalls
Rupture without self-damage — Taking Rupture before you have Offering or Hemokinesis leaves you with a dead card. One self-damage source first, then Rupture.
Too much self-damage, not enough sustain — Brutality + Combust + Offering all firing means you lose 8+ HP per turn. You need Burning Blood, Reaper, or Self-Forming Clay online before stacking multiple passive damage sources.
Blood for Blood too early — It costs 4 and does nothing special without HP loss triggers. Draft Hemokinesis or Combust first, then pick Blood for Blood when it’s already discounted.
Playing Offering at low HP — Below 20 HP, Offering can kill you. Wait for a block turn or a Reaper before spending that 6 HP. An upgraded Offering is still not worth dying for.
Was this guide helpful?
Comments
Leave a Comment