Ironclad Demon Form Strength Build — Best Cards & Relics

Demon Form is the Ironclad’s flashiest win condition — a 3-cost power that gives you 3 Strength every single turn with no expiration. Once it’s in play, every attack becomes a kill shot. But getting there is the challenge. This guide covers how to build around Demon Form, survive while you set up, and close out fights before enemies can punish your slow start.
Build Overview
The Demon Form Strength build is a scaling engine: stall and block while Demon Form stacks your Strength, then end the fight in one or two explosive turns. It’s the most straightforward Ironclad archetype and the one I recommend for new players learning the character.
The win condition is simple: play Demon Form → block for 2-3 turns → kill everything with multi-hit attacks.
Demon Form Strength
Core Cards


 Red Skull
 Vajra
Vajra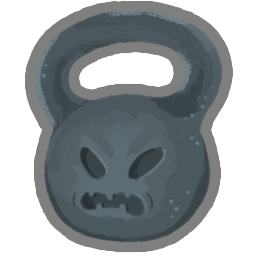 Girya
Girya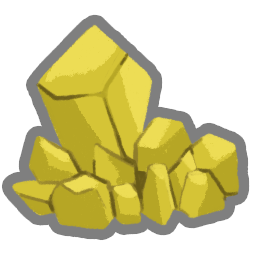 Brimstone
Strategy
Play Demon Form as early as possible — typically turn 1 or 2. Defend aggressively for the next 2-3 turns while your Strength climbs past 10. Use Spot Weakness and Limit Break to accelerate the scaling if you draw them. Close fights with Heavy Blade for single targets or Reaper for multi-enemy encounters to heal to full.
Core Cards
Demon Form — The namesake. At 3 energy, it’s expensive — you’ll often take 10-15 damage the turn you play it. That’s fine. The HP loss is an investment that pays back through shorter fights and Reaper healing. Always upgrade this if you can (2 Strength/turn → 3 Strength/turn).
Heavy Blade — Your primary damage dealer. At 2 energy for 14 base damage, it’s mediocre. But the Strength multiplier (3x instead of 1x) makes it your best Finisher. With 10 Strength, Heavy Blade hits for 44 damage. With 20 Strength, 74. This is how you one-shot bosses.
Limit Break — Doubles your current Strength. The math is brutal: 3 → 6 → 12 → 24 Strength in three turns with Demon Form + one Limit Break. Exhausts on use, so save it for when you have at least 6 Strength to double. Do NOT play it at 0 Strength.
Spot Weakness — If the enemy intends to attack, gain 4 Strength. Fantastic for bridging the gap while Demon Form ramps. Also provides Strength in fights where you can’t afford to spend 3 energy on Demon Form (looking at you, Gremlin Leader).
Reaper — Deals damage to ALL enemies and heals you for 100% of unblocked damage dealt. With high Strength, Reaper turns every multi-enemy fight into a full heal. The reason this build can be so aggressive with HP as a resource.
Shrug It Off — 11 block for 2 energy, draws 1 card. Bland but essential. You need reliable block to survive while Demon Form ramps, and the card draw helps you find your key pieces faster.
Relic Priority
Run-Defining
- Red Skull: +3 Strength below 50% HP. Synergizes perfectly with the self-damage cards you’ll take early. Once you’re in range, Red Skull + Demon Form stacks Strength twice as fast.
- Brimstone: +2 Strength per turn for EVERYONE (you and enemies). Normally dAngerous, but in this build you outscale enemies so fast their extra Strength barely matters. Kills fights in 3-4 turns.
High Impact
- Vajra: Start every combat with +1 Strength. Free Demon Form tick.
- Girya: Campfire for +3 Strength permanently. You can Lift at campfires instead of resting because Reaper handles healing.
- Fossilized Helix: Prevents the first HP loss each combat. Lets you play Demon Form on turn 1 without taking damage — enormous tempo gain.
Nice to Have
- Magic Flower: Healing is 50% more effective. Reaper becomes a full restore button.
Act-by-Act Strategy
Act 1 — Survive and Hunt Demon Form
Don’t force the archetype. Demon Form is a Rare card — you might not see one until Act 2. In Act 1, focus on:
- Take Carnage, Hemokinesis, or Uppercut as early damage
- Fight 2-3 elites — the Ironclad’s sustain from Burning Blood makes this safe
- If you find Demon Form early, upgrade it immediately
- Pick Shrug It Off over damage cards if your offense is already solid
Act 2 — Commit and Scale
By now you should have Demon Form or a clear pivot to Spot Weakness + Limit Break as your Strength source. Act 2 priorities:
- Remove Strikes at every shop (they dilute your Heavy Blade draws)
- Take energy relics from the boss chest — 4 energy makes Demon Form much easier to play
- Pick up Reaper if offered — it solves all sustain problems
Act 3 — Refine and Execute
Your deck should have Demon Form, 2-3 multi-hit attacks, solid block, and Reaper. Act 3 priorities:
- Remove remaining Strikes and Defends
- Add card draw (Battle Trance, Offering) to find Demon Form faster
- Bottle Demon Form if you find Bottled Flame — guaranteed turn 1 Demon Form wins runs
Matchup Guide
Favorable: Slime Boss (aoe Reaper heals through slime splits), The Champ (slow boss, you outscale), Donu & Deca (Reaper hits both)
Unfavorable: Gremlin Leader (summons minions while you’re still setting up), Book of Stabbing (rapid damage outpaces your ramp), Awakened One (punishes power-heavy decks)
Nemesis: Time Eater. Forcing you to end your turn after 12 cards played means you can’t go off with multi-hit attacks. Save Heavy Blade for the big turn and don’t over-commit.
Alternative Cards
If you don’t find Demon Form, this deck still functions with Spot Weakness + Inflame as your Strength sources. You won’t scale as high, but you’re also not paying 3 energy for setup — the deck plays faster. Flex Spot Weakness into Limit Break is a budget Demon Form that works through Act 3.
Cards to AVOID: Barricade (you’re not building block for the long game, you want fights to end fast), Entrench (same reason), Searing Blow (anti-synergy — you want to spend upgrades on Demon Form, not a meme card).
Was this guide helpful?
Comments
Leave a Comment