Ironclad Entrench Block Build — Best Cards & Relics

The Entrench Block build redefines what “Tank” means. Instead of whittling enemies down with attacks, you stack hundreds of block, double it with Entrench, then convert it directly to damage with Body Slam. It’s slow, methodical, and nearly impossible to kill — the perfect build for players who hate taking damage.
Build Overview
The core Loop: play block cards each turn → Barricade keeps block from expiring → Entrench doubles your accumulated block → Body Slam deals damage equal to your block total. After 3-4 turns, you’ll have 200+ block and Body Slam hits harder than any attack in the game.
This build has a simple piloting Pattern: every turn, play all your block cards first, check if you can Entrench, then Body Slam if the enemy is vulnerable. There’s no complex combo timing — just build the wall higher every turn.
Entrench Block
 Anchor
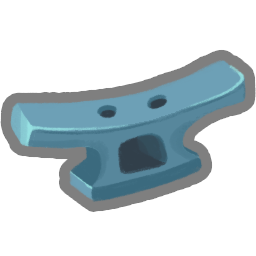 Horn Cleat
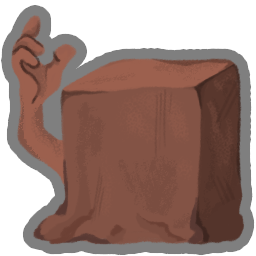 Self-Forming Clay
Strategy
Play Barricade turn 1 if possible. Stack block with Shrug It Off and Impervious. Use Entrench to double your block total every 2-3 turns. Body Slam converts hundreds of block into lethal damage. Against bosses, aim for 300+ block before committing to damage turns.
Core Cards
Barricade — The build enabler. Block no longer expires at the start of your turn. Without Barricade, you’re playing a normal block deck. With it, you’re building an unBreakable fortress. Top upgrade priority (costs 2 instead of 3).
Entrench — Double your current block. With 50 block this gives you 100. With 100 block this gives you 200. The exponential scaling is what makes numbers get absurd. One Entrench is enough; two is luxury.
Body Slam — Deal damage equal to your current block. Costs 0 upgraded. This is your ONLY damage card in the pure version of this build. When you have 200+ block, Body Slam deals 200+ damage for 0 energy.
Shrug It Off — 11 block + draw 1 card. The backbone of your block engine. Draws into more block cards which let you play more block cards. Draft as many as you can find.
Impervious — 40 block for 2 energy. Your emergency button and Barricade setup card. Play Impervious into Barricade on turn 1 and you start with a 40-block foundation.
Ghostly Armor — 13 block for 1 energy, Ethereal. Excellent one-shot block that thins itself from your deck. The Ethereal keyword is actually a benefit here — it removes a card you don’t need for the long fight.
Key Relics
Calipers — You lose only 15 block at the start of your turn instead of all of it. This relic lets you run the build without Barricade. With Barricade PLUS Calipers you’re effectively immortal.
Anchor — Start combat with 14 block. Free turn-1 safety that lets you play Barricade without taking unblocked damage.
Horn Cleat — Gain 18 block on turn 2. Ensures you survive the setup turns when the build is most vulnerable.
Self-Forming Clay — Gain block whenever you lose HP. Covers the rare cases where damage leaks through your block wall.
Fossilized Helix — Prevent the first time you’d lose HP each combat. Critical protection against turn-1 Burst damage before Barricade is online.
Act Strategy
Act 1
Goal: Find Body Slam and one strong block card. Survive until you can draft Barricade.
Pick priority: Body Slam > Shrug It Off > Iron Wave > Clothesline > Anger > Armaments.
Do NOT force this build from floor 1. Take front-loaded attacks early so you can beat Elites while you wait for Barricade or Calipers to apPear.
Upgrade priority: Body Slam (0 cost is mandatory) > Shrug It Off > Barricade.
Act 2
Goal: Find Barricade or Calipers. Add Entrench if offered. Double your block per turn.
Pick priority: Barricade > Entrench > Impervious > Ghostly Armor > Flame Barrier > Disarm.
Now is when the build comes online. Once you have Barricade + Entrench + Body Slam, stop adding damage cards entirely — block IS your damage now.
Prioritize shop removes on Strikes. Every Strike in your deck is a draw that could have been a block card.
Act 3
Goal: Thin the deck, upgrade key cards, add draw consistency.
Pick priority: Impervious > Shrug It Off (more copies) > Battle Trance > Offering > Power Through.
Battle Trance and Offering are premium here because they help you find Barricade on turn 1. Power Through generates block and adds Wounds to your discard — but by Act 3 you shouldn’t be cycling your deck more than once.
Against the final boss, prioritize getting 100+ block before they enter their deadly phases.
Common Pitfalls
Committing to block too early — If you draft Shrug It Off and Entrench in Act 1 without Barricade or Calipers, you’ll die to Gremlin Nob. Take enough attacks to survive until the build comes together.
Skipping Body Slam — It looks like a bad card (0 damage without block). It’s your ONLY damage in this build. Take the first one you see and upgrade it immediately.
Draw inconsistency — All block and no draw means you miss Barricade on turn 1. Shrug It Off, Battle Trance, and Offering are not optional — they’re mandatory consistency tools.
Too many Entrench — One is enough. Two Entrench means you draw Entrench when you need block. The card is dead with 0 block — it doubles nothing.
Was this guide helpful?
Comments
Leave a Comment