Defect Orb Focus Build — Frost Turtle & Lightning Engine

The Orb-Focus build is the Defect’s flagship archetype and the most reliable way to climb ascensions. It’s deceptively simple: channel Frost orbs to become unkillable, channel Lightning orbs to kill everything, and stack Focus to make both better. The beauty is its flexibility — you can pivot between offense and defense by swapping which orbs you evoke, adapting to every fight without cHanging your deck.
Build Overview
The Orb-Focus build is a two-phase engine: Phase 1 fills your orb slots with Frost for passive block. Phase 2 channels Lightning for damage or channels Dark for a boss-killing evoke. Focus is the multiplier — every point of Focus adds +1 block to Frost and +1 damage to Lightning per turn, per orb. At 3 orb slots with 5 Focus and 3 Frost orbs, you passively gain 21 block per turn. The game is solved.
Orb Focus

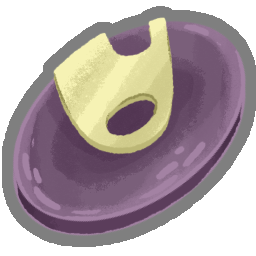 Data Disk
 Gold-Plated Cables
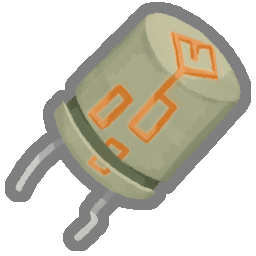 Runic Capacitor
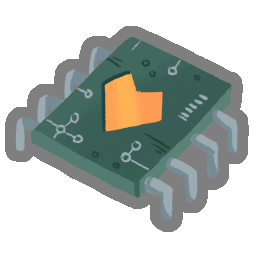 Emotion Chip
Strategy
Priority 1: get Focus online (Defragment or Biased Cognition). Priority 2: fill orb slots with Frost (Glacier, Coolheaded). Priority 3: add Lightning or Dark for damage. The ratio depends on the fight — 2 Frost + 1 Lightning for hallway fights, 3 Frost + 1 Dark for bosses, all Lightning for multi-enemy rooms with Electrodynamics. Evoke strategically — a Dark orb with 40+ stored damage ends boss phases instantly.
Core Cards — What to Pick and Why
S-Tier: The Cards That Define the Build
Defragment — Gain 1 Focus (2 upgraded). The most cost-effective scaling card in the Defect pool. At 1 energy, every point of Focus adds both damage AND block simultaneously. Take every single copy you see — I’ve won runs with 4 Defragments. Each additional copy is better than the last because Focus stacks linearly but the value multiplies across all your orb slots. Three Defragments (+6 Focus) turns a basic Frost orb from 2 block to 8 block. With 4 orb slots, that’s 32 passive block per turn.
Pick priority: Take over almost anything. If you see Defragment vs. any common attack, Defragment wins. The only cards I’d take over Defragment are Echo Form and sometimes Biased Cognition.
Biased Cognition — Gain 4 Focus (5 upgraded), lose 1 Focus per turn. This card reads “win the fight in 5 turns.” +4 Focus on turn 1 triples your orb output immediately. The Focus decay looks scary on paper but is irrelevant in practice: most fights end in 5-7 turns, and the aveRage Focus over those turns is still +2.5, which is better than Defragment+. The real power spike comes when you pair Biased Cognition with Core Surge (gain 1 Artifact) or a Artifact potion — the Artifact blocks the Focus drain debuff entirely, giving you permanent +4/+5 Focus for the rest of combat. This is the Defect’s version of Wraith Form — a card so powerful it warps your entire run around it.
Pick priority: Highest priority Power card. If you have Core Surge or an Artifact source, it becomes the best card in your deck. Take over everything except Echo Form.
A-Tier: The Engine Builders
Glacier — Channel 2 Frost orbs, gain 10 block (13 upgraded). This is the single best card in the Focus build and it’s not close. Glacier does two things simultaneously: it blocks NOW (saving HP this turn) and it blocks FOREVER (2 Frost orbs generating passive block every subsequent turn). At 3 Focus, a Glacier play generates 12+ passive block per turn for the rest of the fight — every single turn. Two Glacier plays with 3 orb slots and 3 Focus = full blocking, zero energy spent on defense after turn 3. Never skip Glacier. Two copies is ideal; three is fine.
Pick priority: Take over all other Frost generators. If you’re offered Glacier vs. Coolheaded in Act 1, take Glacier. The immediate block saves HP against elites.
Electrodynamics — Lightning orbs hit ALL enemies instead of random single targets. This card single-handedly solves multi-enemy fights. With 3 Lightning orbs and 3 Focus, that’s 18 AoE damage per turn, passively, while you spend all your energy blocking. Tri-Slavers, Gremlin Leader, Reptomancer, Darklings, and certain Act 3 hallway fights go from “dAngerous” to “free” with Electrodynamics in your deck.
Pick priority: Take the first copy on sight. It’s good even without Focus. A second copy is redundant — you only need one.
B-Tier: The Workhorses
Ball Lightning — Deal 7 damage (10 upgraded), channel 1 Lightning. Your best Act 1 attack. 7 damage for 1 energy is on-rate, and the Lightning orb stays around dealing 3 passive damage per turn. It’s both front-load and scaling in one card. In hallway fights, Ball Lightning + Dualcast is 23 damage for 2 energy — enough to kill most Act 1 enemies in 2 turns.
Pick priority: Take 1-2 copies in Act 1. Stop taking them once you have better damage (Electrodynamics, Dark orbs for bosses). Too many Ball Lightnings clog your deck in Act 2-3 when you’d rather draw Powers and Frost.
Coolheaded — Channel 1 Frost, draw 1 card (2 upgraded). A defensive cantrip that builds your engine while cycling your deck. It finds your Focus cards faster while setting up Frost. At 1 energy, it’s neutral on energy economy when you account for the card draw. Upgraded Coolheaded+ (draw 2) is one of the best card draw options in the Defect pool — it’s card-positive while generating block. Two Coolheaded+ in a 25-card deck means you see your key Powers 30% faster.
Pick priority: Take 1 copy early, a second in Act 2-3 once you have Focus. Don’t take Coolheaded before you have any damage — you need to kill things first.
Cold Snap — Deal 6 damage, channel 1 Frost. The hybrid pick. It gives you a Frost orb (defense) while contributing damage. Better than Ball Lightning in Act 1 elite fights because the Frost orb blocks, and the Defect’s starting HP is low. Worse than Ball Lightning for pure damage racing.
Pick priority: Take 1 copy in early Act 1. Ball Lightning is slightly better overall, but Cold Snap is safer against elites.
C-Tier: Situational but Powerful
Darkness — Channel 1 Dark orb. Dark orbs accumulate damage each turn — 6 per turn baseline, 9 with 3 Focus. After 4 turns, a single Dark orb holds 36 damage. Dualcast it for 72. This is how you kill bosses. One Darkness + patience = dead Hexaghost.
Pick priority: Take 1 copy by late Act 1 or Act 2. You need a boss-killer. Dark orbs are the Focus build’s answer to high-HP enemies.
Doom and Gloom — Deal 10 damage to ALL enemies, channel 1 Dark. AoE damage plus a scaling Dark orb in one card. Excellent against Sentries and Slime Boss. The Dark orb it channels starts scaling immediately while the 10 AoE clears low-HP threats.
Pick priority: Excellent pick in Act 1-2. Falls off in Act 3 unless you’re running multiple Dark orbs.
Detailed Act-by-Act Strategy
Act 1 — Foundation: Survive and Build Your Orb Engine
Floor 1-3: Immediate Damage First
Your starting deck has 4 Strikes, 4 Defends, Dualcast, Zap, and Cracked Core (1 Lightning orb at start of combat). This is a weak starting deck — you have exactly one Lightning orb passively dealing 3 damage per turn. You NEED front-loaded damage in the first 3 floors.
Card pick priority for floors 1-3:
- Ball Lightning — The best common attack. 7 damage + 1 Lightning orb = immediate impact + scaling.
- Cold Snap — 6 damage + 1 Frost orb. Slightly less damage but the Frost helps against Jaw Worm and Cultist.
- Compile Driver — Deal 7 damage, draw 1 card (2 if you have an orb). Card draw with damage attached.
- Doom and Gloom — If you luck into this uncommon, it’s 10 AoE damage that solves multi-enemy fights instantly.
- Sweeping Beam — 6 AoE damage to all enemies. Weak but playable in Act 1 hallway fights.
Do NOT take: Claw (wrong archetype), Scrape (anti-synergy with orb setup), Coolheaded (you need damage, not draw, on floor 1), any Power without damage.
Floor 4-8: Add Orb Generation and First Power
By floor 4, you should have 2-3 attacks added. Now you can start looking for engine pieces:
Card pick priority for mid-Act 1:
- Glacier — Always take. The 10 immediate block saves HP, and the 2 Frost orbs are your engine’s foundation.
- Defragment — Always take. Your first Focus source transforms Frost orbs from “2 block per turn” to “4 block per turn.”
- Coolheaded — Take 1 copy now. You have enough damage to justify card draw.
- Darkness — Take 1 copy to prepare for the boss fight.
- Charge Battery — Gain 7 block, next turn gain +1 energy. Excellent setup card that lets you play expensive turns.
Elite Strategy (Act 1)
Your elite matchups determine whether you fight 2 elites or play safe:
- Sentries (Easy): Lightning orb hits them while you block. A single Ball Lightning + Dualcast sequence kills one Sentry. You should take <10 damage. Fight this elite confidently.
- Lagavulin (Medium): You need at least 20 front-loaded damage in your first 2 deck cycles. Cold Snap and Glacier are premium here because the Frost orbs block while you chip. Darkness is excellent — set up a Dark orb during the first sleep cycle. Expect to take 15-25 damage.
- Gremlin Nob (DAngerous): This is the run-killer. Nob gains 2 Strength every time you play a Skill. Your orb-channeling cards (Ball Lightning, Cold Snap) are Skills, which means you CAN’T play them freely. You need pure Attack cards — Beam Cell, Compile Driver, Streamline. If you don’t have 2-3 attacks, AVOID this elite. It will deal 30+ damage.
Rule of thumb: Path toward 2 elites in Act 1 if you have 3+ attack cards added. Path toward 1 elite + 1 campfire if you have less. If your first 3 card picks had no attacks, skip elites entirely and prioritize card rewards.
Campfire Priority (Act 1)
- Upgrade Dualcast if you have no better upgrade — Dualcast+ deals 16 damage instead of 8, which is huge in Act 1.
- Upgrade Defragment — +1 → +2 Focus is worth an entire extra Defragment.
- Upgrade Ball Lightning / Cold Snap — 3-4 extra damage per play, adds up across fights.
- Rest only if HP < 25. The Defect has low max HP; don’t risk dying to a bad draw.
Boss Preparation (Act 1)
- Hexaghost: Darkness wins this fight. Channel a Dark orb early and let it cook for 4-5 turns while you block. Dualcast it for 40+ damage. Defragment makes this trivial.
- Slime Boss: Doom and Gloom or Electrodynamics crush this. AoE damage to Break the split slimes before they attack. Darkness + Dualcast on the boss slime.
- The Guardian: Block his Thorn form, attack during defensive mode. Frost orbs are premium here because you spend turns blocking. Channel Lightning during his defensive turns.
Act 2 — Transition: Focus Acquisition and Scaling
This is where the build comes online. Act 1 was about survival; Act 2 is about assembling the engine that will win the run.
Early Act 2 (Floors 1-5): Aggressively Hunt Focus
Act 2 hallway fights are brutal — Shelled Parasite, Snake Plant, and Avocado + Rat demand both block and damage simultaneously. Without Focus, your Frost orbs generate only 2 block each, which is not enough.
Card pick priority:
- Defragment (copies 2-3) — Each additional Defragment compounds. 2 Defragments = +4 Focus = Frost orbs give 6 block each. You become unkillable.
- Biased Cognition — If you haven’t found it yet, hunt it at shops. With Biased Cognition, you can fight 3 elites in Act 2.
- Glacier (copy 2) — The second Glacier means you can fill your orb slots in 1-2 turns instead of 3-4.
- Electrodynamics — By now you NEED AoE. Act 2 multi-enemy fights are the hardest in the game. Electrodynamics makes them free.
Mid Act 2 (Floors 6-10): Orb Slot Expansion
Once you have 2+ Focus sources, expand your orb slots. More slots = more passive value per point of Focus. At 3 slots with 4 Focus, that’s 18 block per turn from Frost. At 5 slots with 4 Focus, that’s 30 block per turn.
- Capacitor (card): +2 orb slots. Always take if you have Focus.
- Runic Capacitor (relic): +3 orb slots. One of the best boss relic picks.
- Loop: Your first orb triggers twice. With Frost, it’s like having an extra orb slot.
Elite Strategy (Act 2)
- Tri-Slavers (Easy with Electrodynamics, Medium without): Focus the red Slaver first (he applies Vulnerable). With Electrodynamics, Lightning orbs kill all three simultaneously while you block.
- Book of Stabbing (Medium): The multi-hit attacks demand consistent block. Frost orbs + Focus out-scale the book by turn 4. Glacier is your best card here.
- Gremlin Leader (Hard without AoE): You MUST have Electrodynamics or Doom and Gloom. Without AoE, the respawning gremlins overwhelm you. With AoE, you kill minions and damage the Leader simultaneously.
Campfire Priority (Act 2)
- Upgrade Biased Cognition — +4 → +5 Focus is a 25% increase.
- Upgrade Defragment — If not yet upgraded.
- Upgrade Coolheaded — Draw 1 → Draw 2 is a massive consistency boost.
- Rest only if HP < 20.
Act 2 Boss Preparation
- The Champ: He buffs (gains Metallicize) until below 50% HP, then hits for 60+. Strategy: scale slowly during phase 1. Set up all your Frost orbs, stack Focus, and channel a Dark orb. The moment he drops below 50%, Dualcast the Dark orb to skip phase 2 entirely. Don’t trigger phase 2 until your Dark orb has 50+ stored damage.
- Bronze Automaton: Hyper Beam deals 45+ damage. Frost wall is essential. Have 3+ Frost orbs up before Hyper Beam. After he steals your orbs (Hyper Beam removes all orbs), you’ll need to re-channel immediately — keep a Glacier or Coolheaded in hand.
- Collector: Summons minions that hit hard. Electrodynamics trivializes this. Kill the minions first — they deal more damage than the Collector herself.
Act 3 — Optimization: Refine and Prepare for Endgame
By Act 3, your deck should be 25-35 cards with 2-4 Focus sources, 3-6 orb slots, and a mix of Frost and damage orbs. You’re not adding many new cards now — you’re removing bad ones and upgrading key pieces.
Card Pick Priority (Act 3)
- Echo Form — The best Defect card. Double your first card each turn. Echo Form + Defragment = +4 Focus. Echo Form + Glacier = 4 Frost orbs + 26 block. It costs 3 energy but ends the fight the turn after you play it.
- Creative AI — Generates a random Power each turn. In long fights (bosses), it creates game-Breaking combinations: multiple Defragments, multiple Echo Forms, infinite scaling. It’s slow but unstoppable.
- Seek — Search your draw pile for any card. Seek into Biased Cognition or Echo Form = win. Seek+ searches for 2 cards. The best consistency card in the game.
- Core Surge — Gain 1 Artifact, deal 11 damage. Pairs permanently with Biased Cognition to block the Focus drain. Even without Biased Cognition, Artifact blocks debuffs like Vulnerable and Frail.
- Rainbow — Channel 1 Lightning, 1 Frost, 1 Dark. Fills 3 orb slots instantly. Amazing if you have Runic Capacitor or Inserter.
Act 3 Hallway Fights
- Darklings (3 enemies): Electrodynamics wins. They respawn once, so AoE is essential.
- Orb Walker: High HP, hits hard. Frost turtle + Dark orb. Same strategy as bosses, just faster.
- Spire Growth: Constricts you (damage per turn). Kill fast with Lightning orbs.
- Transient: Dies in 5 turns. Burst damage. Lightning orbs + Dualcast should do 250+ in 5 turns.
Elite Strategy (Act 3)
- Nemesis: Intangible every other turn. Time your Dualcast/Essence Burst for the turns it’s NOT Intangible. Frost wall blocks the burns it adds to your deck. A 40+ damage Dark orb on a non-Intangible turn one-shots.
- Reptomancer: PRIORITY ONE KILL THE DAGGERS. Exploding daggers deal 25 damage each. Electrodynamics kills them passively, but you need 2+ Lightning orbs up by turn 2. Cold Snap + Ball Lightning turn 1 are mandatory.
- Giant Head: It takes 5 turns to scale. You take 5 turns to out-scale it with Focus. This is a free fight if you have 3+ Focus — your passive block outpaces its damage.
Final Boss Preparation
The Defect has one of the strongest endgames but struggles against specific Act 3 bosses:
Time Eater (Nemesis) — 12-card limit. This is the hardest fight for the Defect. Strategy:
- Do NOT play 0-cost cards unless essential (they waste your 12-card clock)
- Set up your orbs in the first 2 turns and then mostly pass
- Let passive damage kill — each card played should be high-impact (Defragment, Glacier, not Ball Lightning)
- Dark orb + patience — one big Dualcast is worth 3 turns of Lightning chip damage
- Goal: play 6-8 cards total. Frost orbs + Focus mean you block without playing cards.
Awakened One (Favorable) — Powers are your whole deck, but you out-scale the Strength gain:
- Play Defragment and Biased Cognition anyway — the Focus out-values the Strength it gains
- Phase 1: Kill the 2 cultists first (they give it Strength on death, but less than leaving them alive and attacking)
- Phase 2: Frost wall. The Awakened One hits at most 3×12, which 20 passive block laughs at.
- This is a won fight if you have 3+ Focus.
Donu & Deca (Favorable) — They buff each other. Focus Donu first (he buffs Strength, which makes Deca’s multi-hits deal more damage). Frost orbs block everything. One Dark orb + Dualcast kills Donu at 200+ HP. Then Deca is a Frost turtle check — if you can block 20 per turn, you win.
Act 4 — The Heart (If You’re Going for A20 Heart)
The Heart deals 67 damage on turn 3. If you can reach Act 4, you need:
- Buffer — Prevents one instance of HP loss. Blocks the turn-3 massive hit. Buffer+ blocks 2 instances.
- Genetic Algorithm — Gain block permanently. A Genetic Algorithm that’s been in your deck since Act 1 can block 30+ passively.
- Core Surge + Biased Cognition — Permanent +4/+5 Focus without the drain. This combo beats the Heart.
- Frost turtle with 5+ Focus and 4+ orb slots — you passively block 30+ per turn, which beats the Heart’s damage output.
Relic Priority
Run-Defining
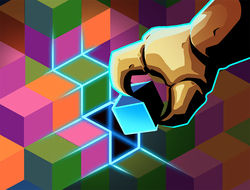
- Data Disk: Start each combat with +1 Focus. A free Defragment at the start of every fight. Stacks with actual Defragment. This relic alone improves your win rate by 15%.
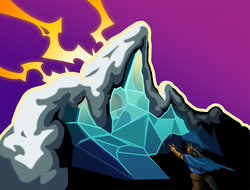
- Runic Capacitor: +3 orb slots. The single best boss relic for the Defect. 6 slots = 6 orbs × Focus = passive block + damage sufficient for every fight in the game.
- Inserter: Gain +1 orb slot every 2 turns. In boss fights, you reach 8-10 orb slots. At that point, you’re generating 50+ block and 40+ damage passively per turn. The game plays itself.
High Impact
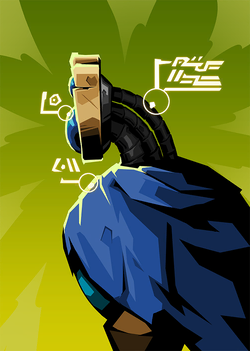
- Gold-Plated Cables: Rightmost orb’s passive doubles. Place your Frost orb in the rightmost slot — at 5 Focus, that’s 14 block from ONE orb per turn. Stacking this with multiple Frost orbs makes you functionally immortal.
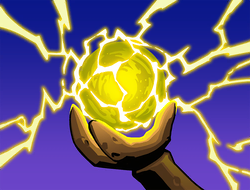
- Emotion Chip: When you take damage, gain +1 Focus for the rest of combat. Triggers 3-5 times per boss fight. It’s a free Defragment that scales with difficulty.
- Symbiotic Virus: Adds a Darkness orb to your starting hand. Free Dark scaling in every fight, which means every hallway fight ends 1-2 turns faster.
Nice to Have
- Cracked Core Upgrade: Start with +1 orb slot. 4 slots from the start of combat accelerates your engine by 1 full turn.
- Horn Cleat: Blocks 14 damage on turn 2. Buys you one more setup turn, which is often the difference between winning and dying in Act 2.
- Incense Burner: Every 6 turns, gain Intangible. Time it for boss phase transitions or Heart’s turn 3.
Matchup Guide — The Hard Fights, Solved
Bosses You Crush
Hexaghost — Predictable attack Pattern: small hit, small hit, BIG HIT, repeat. Set up Frost orbs during the small hits, block the big hit, and let Lightning/Dark kill. Darkness makes this fight free — a 30+ Dark orb Dualcast during the Inferno turn skips the second cycle.
The Champ — He gives you 3-4 turns of setup before executing. Stack Focus, fill Frost, charge 2 Dark orbs. Trigger phase 2 with a Dualcast that deals 80+ damage. If you can’t one-shot, Frost wall the Execute (60 damage) and finish with Lightning.
Awakened One — You’re a Power-heavy deck fighting a boss that gains Strength when you play Powers. The trick: your Focus scaling out-values its Strength. Every Power you play gives it +1 Strength (+1 damage per hit). Every Focus you gain gives you +1 block per Frost orb per turn. At 3 Frost orbs, +1 Focus = +3 passive block vs. its +1 damage. You win the math. Play Powers freely.
Bosses That Test You
Time Eater — 12-card limit forces efficient card usage. Strategy: play 6-8 cards TOTAL. Frost orbs + Focus carry your block. One Dark orb + Dualcast for damage (2 cards). The other 4-6 cards are setup Powers. Pass turn libeRally — your passive output wins.
Corrupted Heart — 67 damage on turn 3. You need 20+ passive block by turn 3. Biased Cognition + Core Surge is the simplest solution — permanent +4 Focus makes 3 Frost orbs block 18. Buffer, Fossilized Helix, or Genetic Algorithm cover the rest. You need to deal 800 damage through the Heart’s Beat of Death (2 damage per card played), so lean on passive orb damage and play as few cards as possible.
Alternative Cards — The Second String
These cards aren’t core but have strong niche uses:
Loop — First orb triggers passive twice. At 1 energy, it’s effectively +1 orb slot for the value of your best orb. Place Frost in slot 1 for double block. Place Dark in slot 1 to double its scaling rate. Better than Capacitor in small-deck builds.
Static Discharge — When you take unblocked damage, channel a Lightning orb. Excellent against multi-hit enemies (Book of Stabbing, Heart) — each hit channels another Lightning orb, which then evokes and deals damage. It turns incoming damage into your offense.
Recursion — Evoke your next orb, then channel it. Use this to re-position orbs for Gold-Plated Cables (move Frost to the rightmost slot) or to trigger multiple Dark orb evokes in one turn. Skill-testing but powerful.
Self-Repair — Heal 7 HP (10 upgraded). Act 4 insurance. The Defect has no other sustain. One Self-Repair can save a run by healing 20+ HP across a boss gauntlet.
Hologram — Return a card from your discard pile to your hand. At 0 energy (upgraded), it’s free consistency. Fetch back your Defragment that you discarded, or get a second Glacier play. One copy dramatically improves your deck’s reliability.
Cards to AVOID
- Claw — Different archetype. Claw wants 0-cost attacks and All for One. You want orbs and Focus. These strategies don’t mix.
- Scrape — Draws 4 cards, plays only 0-cost ones. Your deck is full of 1-2 cost Powers and Skills. Scrape will miss on 80% of your deck.
- Hyperbeam — Deal 26 AoE damage, lose 3 Focus. The -3 Focus penalty is devastating. You spend 3 turns recovering. This card is for a different build (Reprogram/Claw).
- Reprogram — Gain 1 Strength and 1 Dexterity, lose 1 Focus. Anti-synergy with Focus. This is for a physical Defect build, not an orb build.
Was this guide helpful?
Comments
Leave a Comment